
The SimCube Part 2 - Assembly
- Mirko

- Sep 7, 2024
- 2 min read
In the last few weeks I have been building the projection screens (SimCube). When the room was ready, I went to the nearest hardware store to buy materials. There I bought lots of construction slats, a few beams and 3mm MDF boards.
Tip 1: If someone wants to recreate this, be sure to use the 3mm MDF boards that are coated white or grey on one side. These are more stable when bent. The uncoated MDF breaks much more quickly when bent.
Tip 2: Be sure to wear respiratory protection when working with MDF.
I used FFP2 masks.
The first thing I did was build the framework of the cube using a post and beam construction.

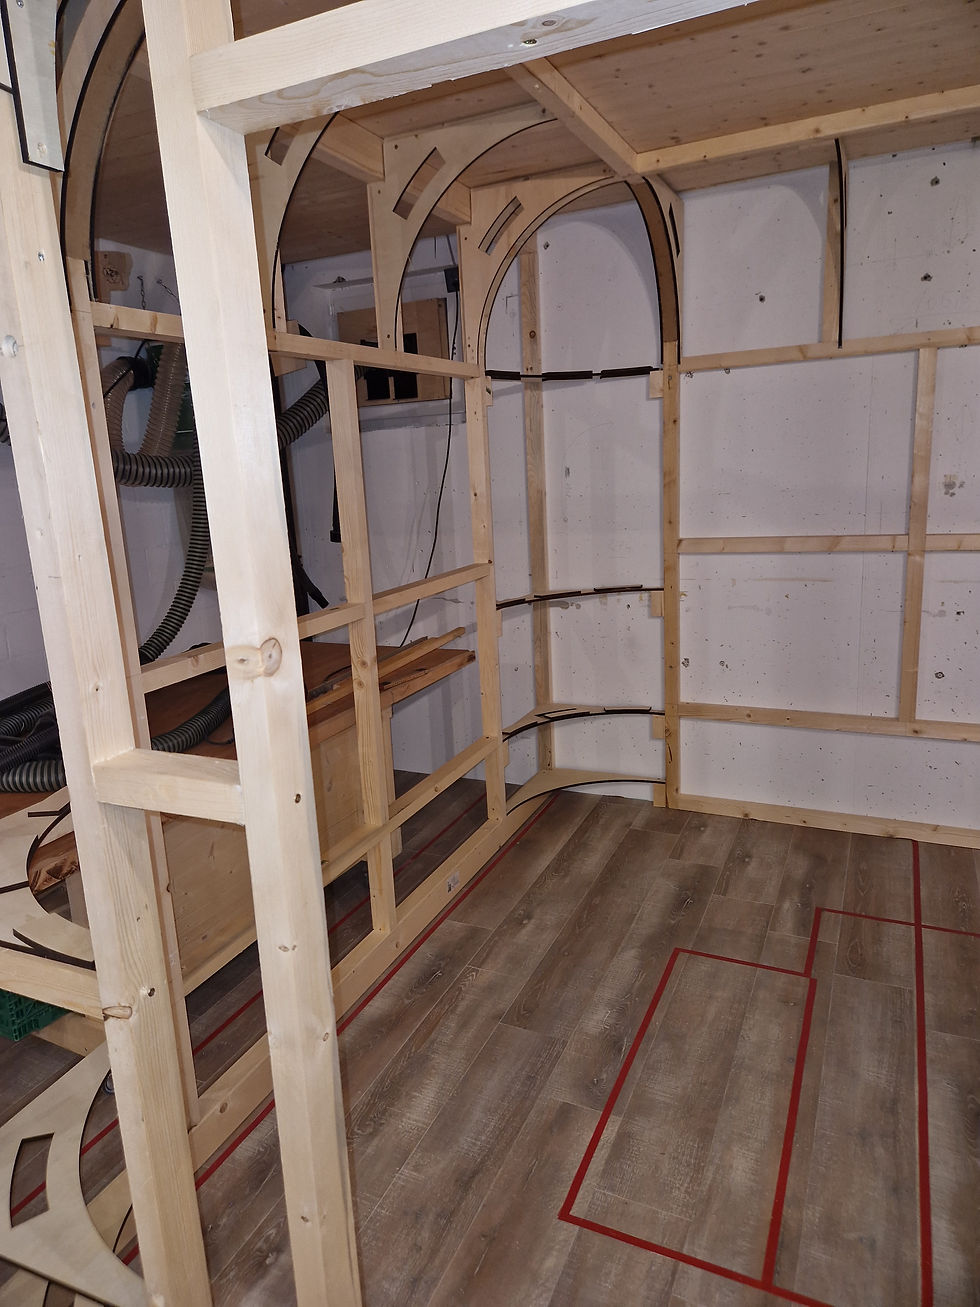
To form the rounded corners, I used the CO2 laser to cut shapes that will later be used to force the MDF into the appropriate shape.
Here is a drawing of the corners from Lightburn (laser processing software).
The oval remainder from the middle of the lasered shape will later serve as an assembly aid. This will force the MDF into the shape and hold it until the glue has hardened.

Then I covered the structure with 3mm MDF that was coated on one side. The MDF was glued with assembly adhesive. This is somewhat flexible in order to compensate for the different expansion coefficients between the MDF and the stud frame and should compensate for cracks at the panel transitions.
The Sim room in the basement is largely temperature-stable, but it's better to have it than to have had it....

Even though you might think that the white coated side of the MDF would be ideal as a projection surface, I chose this as the back for two good reasons.
The surface of the white side is not smooth but slightly grainy. If you fill and sand the joints of the MDF later, you will get a smooth surface after sanding. I am very sure that you will see the different surface structures later on the projection. In the worst case, I would then have to fill the entire cube smooth later. I wanted to avoid that.
The surface still needs to be filled and sanded in many places to conceal the visible transitions between panels and the screw holes. The problem here is that the coating is very difficult to sand.
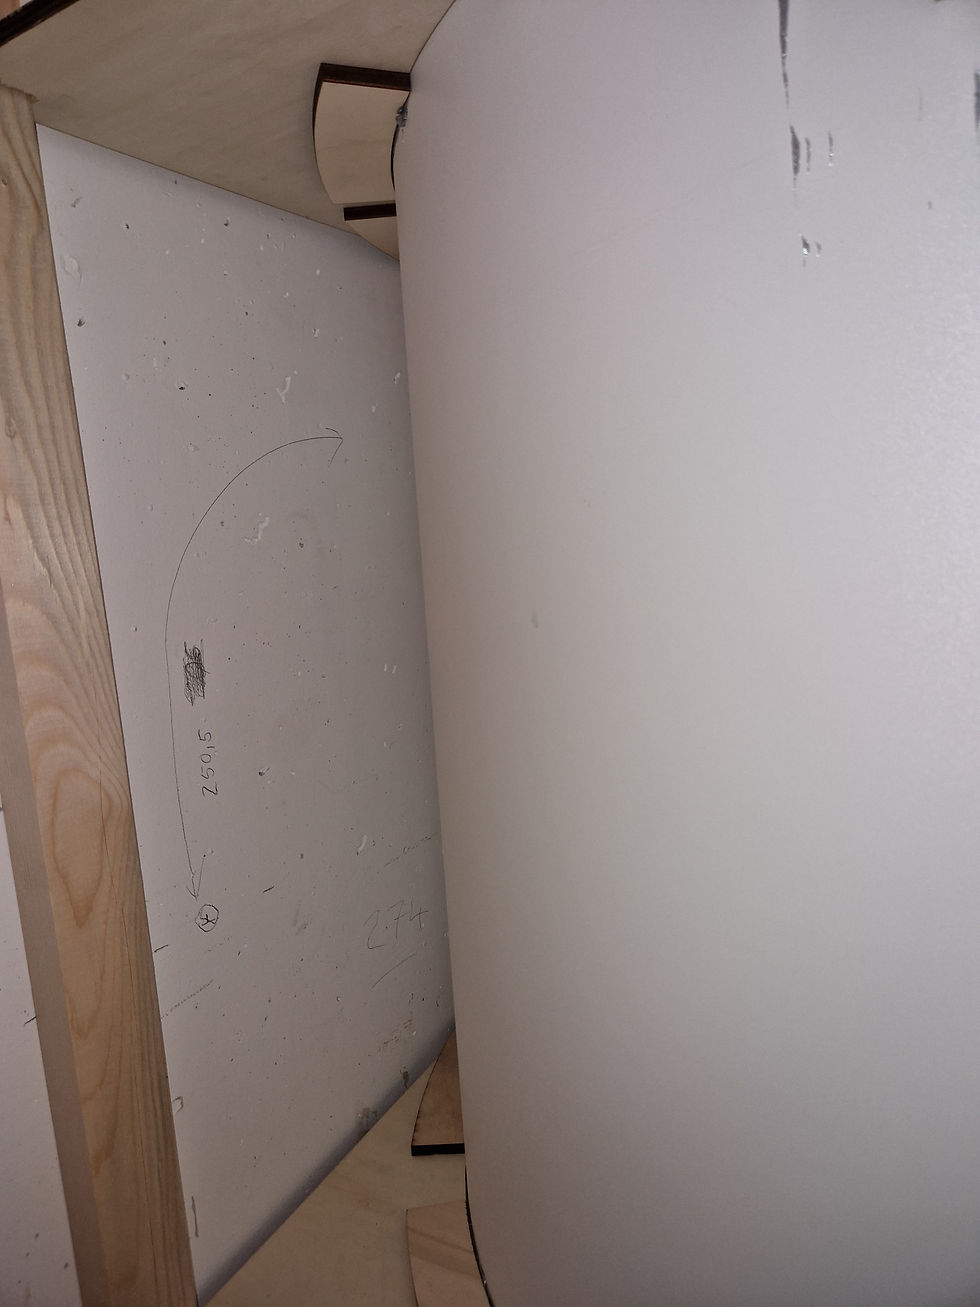
The formation of the four corners was really tricky. Geometrically, this is a quarter of a sphere with a radius of 46cm. The problem here is that you can bend the MDF (and also paper) into a 90° curve in two dimensions at the same time.
Finally, I had to build and glue a frame onto which 2cm strips of MDF were then glued into the resulting shape.


I used the remains of the lasered angles as a construction aid to maintain the radius and curvature.

......The post ends here for now. I will post more pictures once the cube has been filled.


Comments